February 17, 2020
How To Compete in Design

DURATION
25 mincategories
Tags
share
It may seem a bit complicated at first for some when beginning to compete in Topcoder challenges. Fortunately for you, we have an A-Z guide to help you through your first competition and reference for any other time you need it. Feel free to bookmark and follow the written instructions below.
Contents
Select a Challenge
The first step to compete on Topcoder is to select a challenge from the Challenge Listings page and choose a challenge that is in it’s “Checkpoint Submission” phase.

NOTE
The majority of design challenges are two rounds unless it is a one round type challenge such as a Design First2Finish, Rapid User Experience (RUX), or Live User Experience (LUX).
On the Challenge Listings page, note the type of challenge it is (hover over the blue box to learn more) and if you care to proceed you may click on the challenge title, which will take you to the Challenge Details page.

NOTE
RUX’s and LUX’s are a special type of challenge on Topcoder and it usually offers high prizes and multiple winners.
Register
On the Challenge Details page you can see the register button in the top right corner. Click that button to register for the challenge.
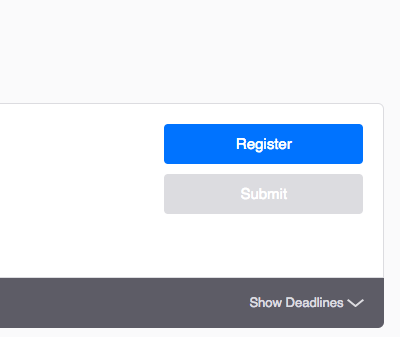
Once you have registered, you will have access to the challenge files and documentation. Usually, all of the assets that are provided by the client can be downloaded from the “Downloads” section on the right side. Looking through these files is important as you can then determine whether you want to continue working based on the software involved. If you have already registered and decided that you do not want to participate, you can simply unregister from the challenge so that your rating does not become penalized.
Each challenge has its own forum, so make sure to check there as sometimes there may be additional files provided by the copilot or client. You can also find discussions related to the challenge spec in this forum as well. You can find a link to the forum on the challenge details page.
It is also important to note that you should also “Watch” each challenge forum as you will receive email notifications whenever someone posts in there, which could contain important information.

Read and Understand the Design Spec
The spec is divided into two parts:
Round 1 Requirements
Round 2 Requirements
If the challenge that you are currently participating in is a two-round challenge, for the Checkpoint phase you only need to submit the Round 1 requirements. The Round 2 requirements should be completed in the Final Round.
If you have read the spec and you still have questions, just ask it in the forum. Once you understand the requirements, the next step is to start designing!
Create and Prepare Your Design
When creating your designs, make sure you organize your design sources by naming your layers and folders properly as that will help the clients and developers work with your files.

After you finish designing, you will need to prepare these deliverables for submission:
DELIVERABLES:
Source.zip
Create a folder and name it Source. Put all of your design source files ( .fig,.sketch, .xd, .psd, .ai, etc) in there and compress the folder into a zip file. If your source file is in Figma, you need to save it locally and add it to your source file.
Submission.zip
Generate all screen requirements and it’s interaction features as a JPG or PNG into one folder called “Submission”. Include the different views of your design (.png or .jpg format) and compress the folder into a zip file. Make sure to name your PNG/JPG files in ascending order like:
Login.png, 01. Homepage.png, 02. Profile.png, and so on…
The naming convention doesn’t have to look exactly like this. The point is to name these files so that the client can view the images in the order that you want them to see it in. Many challenges require you to create a MarvelApp prototype, so make sure you provide that link in the submission folder. You can accomplish this by creating a file called marvelapp.txt and pasting your MarvelApp prototype link in that .txt file or combine this to your declaration.txt
Declaration.txt
If your design contains 3rd party assets (fonts, stock icons, stock photos), you will need to declare all of those assets in one single document so the client can easily find and buy the assets if your design wins the challenge.
Make sure to only use 3rd party assets from the approved sites, using any materials unless otherwise specified will result in a failed screening. A submission that does not pass screening will not be presented to the client and will be ineligible for a placement.
For most of the Topcoder challenges, one or more Marvel projects will be assigned / self-assigned to you for different devices: desktop, tablet and/or mobile, so you can add your designs there for presentation purposes. The Marvel links should also be declared in this file. The customer is reviewing in Marvel so make sure your screens are ordered the way you want it to be seen.
Here is an example of how your declaration file should be presented:

Preview.png
You need to create a preview of your design with a size of 1024 x 1024 px. Think of this as a one page presentation of your final submission. Include the most important screens and what they would actually look like on the device(s) you are designing for.
Submit Your Design
The deadline is near and after all that hard work, your design is finally complete. Now, it is time to submit your design! To do this there are few simple steps that you will need to follow to make sure your design is successfully submitted to the challenge.
1. Zip all 4 files into one single zip file
Once all four files are created, the next step is to compress them into a zip file.
Name the file as your wish, but we recommend to use the challenge name as the file name, for example: “Tiger - DViz Dashboard Viewer Responsive Web App Design Concepts Challenge”

2. Make your submission on the Challenge Details Page
Once you are done zipping your design submission, open the challenge details page and click the “Submit” button
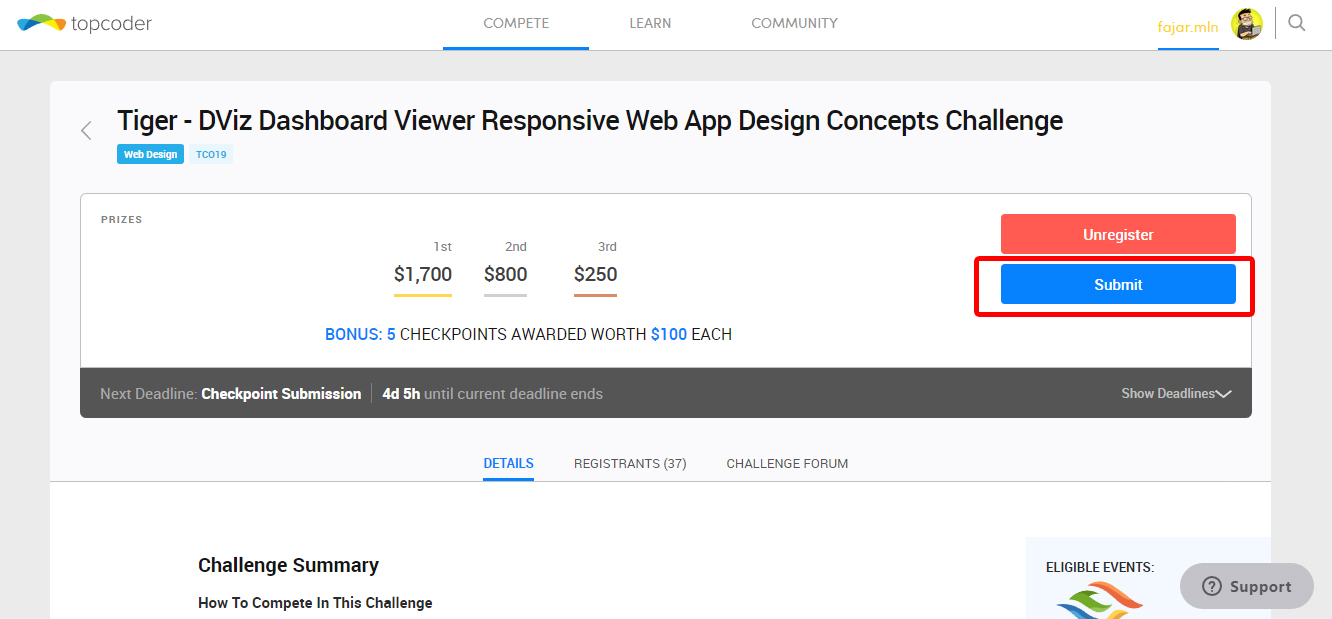
This will take you to the upload page, which will allow you to upload your design submission to the challenge.
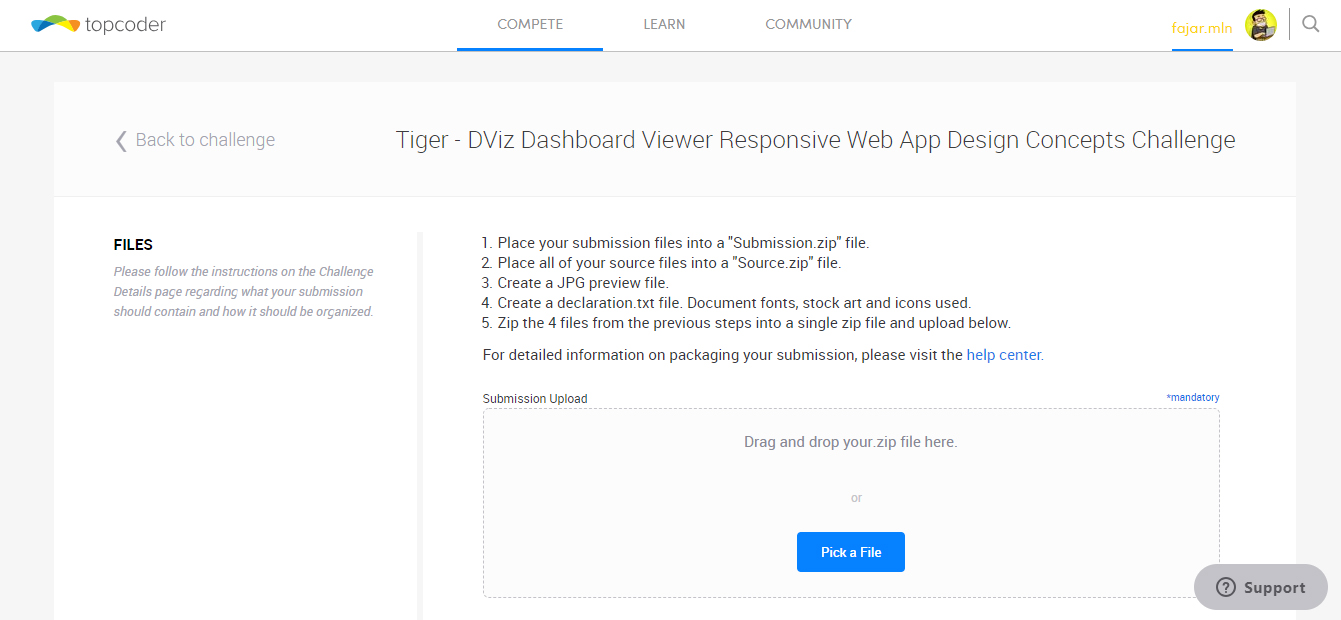
3. Upload your submission
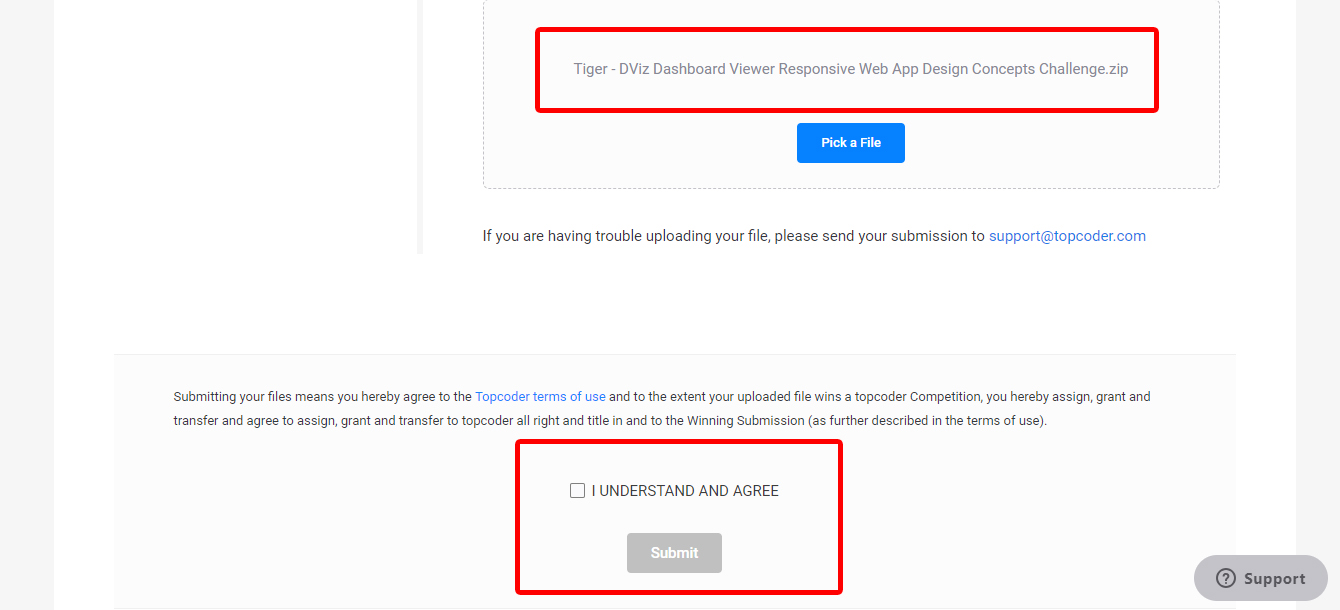
To upload your submission to the challenge, you can drag and drop the zip file into the “submission upload” box or click “Pick a File” button to select the zip file from your local machine.
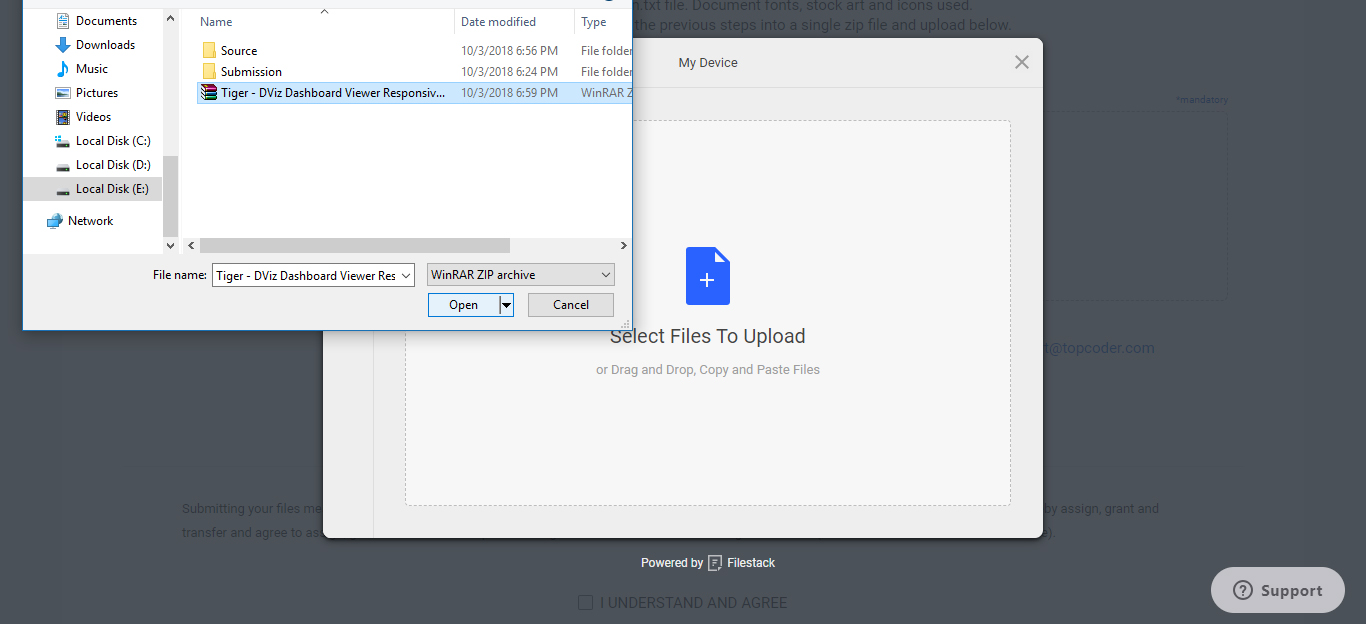
Once the submission is attached, you will be redirected back to the upload screen. After reading Topcoder’s Terms of Use, click the “I understand and agree” checkbox and click the “Submit” button and your submission will be uploaded to the challenge.
4. Check Your Submission Status
After your submission has completed uploading, click the “View My Submissions” button to make sure your submission was officially submitted to the challenge.
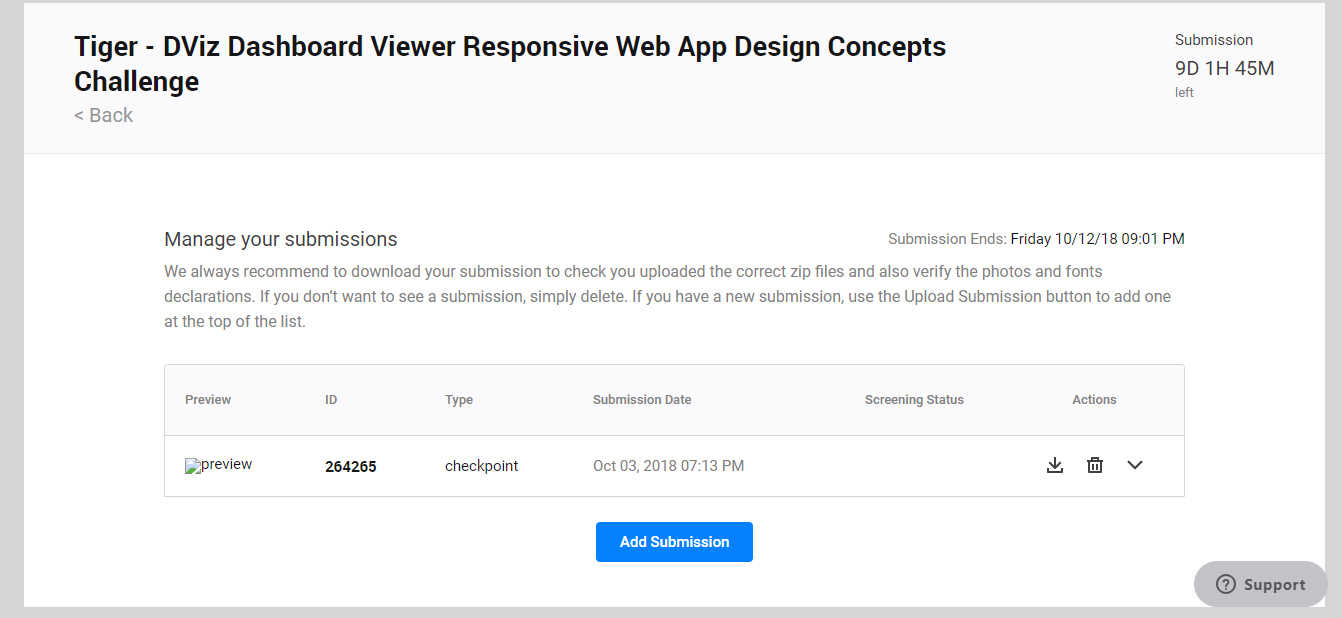
If the submission ID is shown in the table then that means your submission has been submitted successfully!
With the “Actions” column in the table, you can do a few things such as: downloading your submission, deleting your submission, and seeing the submission details.
If you want to add another submission, you can click the “Add Submission” button and repeat the upload process from the beginning.
Winner Announcement
The review of the Final Round takes a few days to complete so be sure to keep an eye on your email because once the review has ended you will get notification (you will receive a separate email if you win). After you see the email announcement, make sure to check the challenge forum as well because the copilot may have other information to provide.
If you do win the challenge, the next step is to complete the final fixes if needed. The Final Fix phase is performed if the client has minor details to change or wants to mix elements from runner-up designs. If the fixes are large, there may be an additional payment for you to complete them.
Getting Paid
Once the final fixes are completed and the challenge is closed, your payment will appear in PACTS. You will be able to see the creation date as well as the release date (payments are typically released 30 days after the creation date).
There are three ways to receive your money from Topcoder after your payment is released: Paypal, Payoneer, or Western Union. Remember to also fill out all necessary tax forms (you will not get paid until the proper forms are filled out). For more detailed information, visit this Thrive article.
Extras
LUX & RUX Challenges Explained!
Live User Experience (LUX) and Rapid User Experience (RUX) are special types of challenges in Topcoder Design. You will find that these types of challenges usually have higher payouts and award more placements. These challenges run fast, which means it is a one round challenge that usually runs 48 hours for LUX and 72 hours for RUX. Even though this is a one round challenge, there will be a point in the competition where you can submit your design in the middle of a challenge (specific time will be mentioned in the challenge details). This part of the competition is called a Rolling Checkpoint and this is a great opportunity to receive feedback and the first 8 qualifying submissions will also receive $50!
Using Marvel Application for UI Design Challenges at Topcoder
It has become more frequent to see Marvel being utilized in Design challenges at Topcoder. It is a great tool to present your designs to the client and have them provide feedback as well.
We have put together this walkthrough video to guide you on how to use the app for Topcoder challenge purposes.
Properly Declaring Your Files
You MUST declare every single design file and element from your submission including: fonts, icons, and stock art that were not created by you so that we can track and take care of the administration for those files before handing the final design deliverables to the client.
Any 3rd party design files and elements MUST comply and follow our Policy Rules (see Fonts, Icons and Stock Art policy for more details). DO NOT use any design files and elements that are not approved by Topcoder in your design.Do not add your username or personal information in your declaration files, keep it anonymous.
You can use this Declaration Files Template as a base to declare your design files (download it as a pdf, replace the content with your design files and elements in a text editor, and upload it with your design submission).
Be specific when you declare your design files, do not just add generic information. For example, do not put “I’m using this picture from google.com”, this will result in a failed screening for your submission. Provide as much detail as possible about your 3rd party design in the declaration files.
For any design files and elements that belong and come from the client, put a note in the template that those files were provided by the client.
FAQ
Here are a few answers to our most common questions.
What design tools are accepted when competing in a Topcoder challenge? Can we use open source tools like Gimp or Affinity Designer?
Typically design tools that are being used by industries/companies world wide are accepted such as: Adobe Photoshop, Adobe XD, Sketch or Illustrator. Topcoder right now does not allow open source tools such as GIMP or Affinity Designer when competing in design challenges.
The challenge deadline is getting close and I am having trouble uploading my submission, what do I do?
You should ask support@topcoder.com for help via email and cc the challenge’s copilot/PM in the process.
Why can’t I see the designs after the winners were announced?
Many clients desire to keep their competitions private. They also may not want to influence the designer’s creativity, which is why sometimes it is the reason we hide their company’s name in challenges.
Are we allowed to post our designs from Topcoder challenges in our online design portfolios?
We prefer that Topcoder designers do not post their design submissions on the Internet. If it is important for your portfolio, please scrub all branding guidelines (remove the logo and change the colors, font, etc) and remove any hint of its relation to the client.
However, if the challenge requires NDA in the beginning, any work related to the challenge, cannot be posted online.